Thursday, December 31, 2009

A Year End Post About Little Jobs

Weather has mostly been either wet or cold or both and progress has been slowed, but I’m still plugging along.  Electrical is ongoing, but I’ve done a few other projects as well.

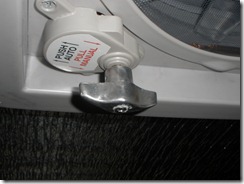
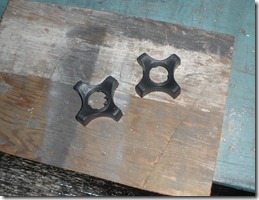
I wanted to use the knobs from the Hehr lifters to replace the black plastic knobs for cranking up the Fantastic Vents.  I cut the centers out of the plastic knobs and glued them into the old Hehr knobs and added a screw to attach to the shaft.

PC190317

PC190316

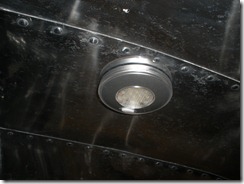
On the electrical side, I’ve been running wires.  I’m using marine wire, tinned and stranded, both for the 110 volt and 12 volt systems.  I’ll be mostly on the 12 volt side and using LED lighting for everything.  These puck lights from VTS will be in a row on the overhead.

PC190318

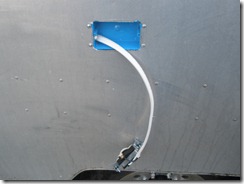
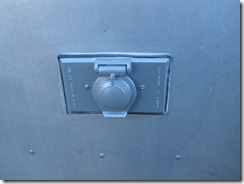
Added an external 110 volt plug on the outside and converted the original socket to 12 volt, mostly with the idea that I could hang an LED light under the awning at times.

PC260321

PC260322

PC310326

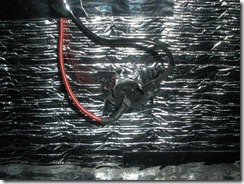
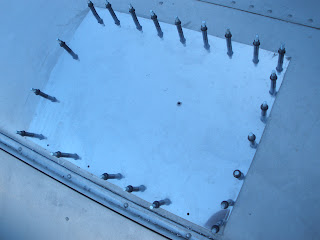
I’ve used 10 gauge wire to run from the feed studs for the solar panels and covered the connection with boots.

PC310327

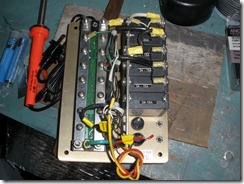
I’m using panels from Blue Sea Systems for both AC and DC systems.  The 12 volt is on the way and this is the 110 volt version.
PC310328

PC310329

Tuesday, December 1, 2009

It didn't rain today!!!


Seems like it rained every day in November, but December has started off dry and we even saw the sun. Looks like a couple of dry days ahead, so started mounting the Fantastic Vents today. One is in and the other tomorrow.

I'm really pleased with the old Hehr cover mod. Didn't really know if it would show, but that nice shiny inside with the Hehr logo shows up well from inside with the vents extended.

Based mostly on some VAP discussion of Fantastic Vent installs, I bedded it in silicone (as Vulkem seems not to stick to the plastic) and used stainless pan head screws (1/2" #10) with washers to screw the flange down. Didn't use the supplied gasket, just lots of silicone. Laid a blue masking tape line down around the perimeter and that controlled the mess.


One goof. I ordered the inside trim piece with the curve, but it's clearly too much for my roof (which is really pretty flat right on top). Should have ordered the flat trim piece, but it'll be easy enough to trim.


As a follow up on my trailer's history, I got a phone call a week or so ago from the son of the original owners. He says he visits his mom about once a month and will get some info together for me next time he goes to see her on the island. Told me he clearly remembers the trailer arriving (he was in high school at the time) and that his parents had gone to Jackson Center to pick up a Bubble, but had gotten such a good deal on the Caravanner that they went with the bigger trailer. R.J. Dial's site says only one Bubble was made in Ohio that year, so maybe that had something to do with it too. Anyway, it looks like I'll get some nice info on my trailer's past (he said it was their baby and went everywhere with it) so that's really exciting to me.

Tuesday, November 17, 2009

Making Fantastic Vents Fantasticer

While searching airforums for threads about Fantastic Vent installs I came across this one by jbond, Herb, about using the original Hehr vent covers on a Fantastic Vent.  Hehr Covers on Fantastic Vent  Herb was also nice enough to post an article he had written about the mod as well.  Thanks Herb.

My vent covers were (and are) pretty battered, but they polished up pretty well and look, I think, a lot better than the gray plastic cover that comes with the Fantastic Vent.  Nothing really changes except the gray plastic is sandwiched by the inner and outer parts of the old Hehr Vents.

Rain has really hit us hard and it'll likely be months before I can actually mount the Fantastic Vents, but at least they're ready to go when I can.


Wednesday, November 4, 2009

Provenance

I'm pretty sure my trailer lacks a truly great history like Scott's around the world trailer, but still, I've wondered what it did, how it got those huge piles of dirt in the bellypan, maybe just where it has been. There was some information with Island Girl when I got her: I knew the name of the original owner, an address or two, but not much more. I even found a copy of Wally's "Fifth Avenue on Wheels".  Google told me the orginal owner was buried on Lopez Island, one island over from where I got her. So, I figured that was about the end of it.

In my internet searching, I did find one address of a person with the same last name on Lopez. I wrote that person a letter a few weeks ago, asking if there might be a connection to my trailer. Expected to hear nothing back. Today in the mail there was a typewritten reply to my letter. He was buried, but she is still alive and 92 years old. She wrote that she'd get some information on the trailer together and get back to me. How cool is that?

Insulation work continues. Tomorrow I'll get the front end cap area done and that'll put me at around three quarters of the first layer done. Second layer will wait until the wiring is done.

Can't wait to hear again from Island Girl's first owner.

Friday, October 30, 2009

I Really Like This Stuff

Prodex Insulation.


I'm mostly doing what has already been documented on Airforums by Malconium, Uwe, Carlos and others. Rich the Viking got me thinking about 2 layers and that's the way I'm going to go. Using 1/2" deep strips of foam insulation between the shell and the first layer of Prodex, glued on with foamboard adhesive. The next layer of Prodex will sit on another 1/2" deep strip of foam insulation and that will just about fill the 1 1/2" cavity inside the ribs. The wiring will go between the two layers of insulation.


Like many have done, my Prodex came from Insulation4less.com  and I ordered the tape for the seams and edges from them as well. Hopefully, one roll of insulation gets it done.


It's so easy to work with this stuff. Cuts with scissors, simple to fit. I had one day with the sun out (must have been weeks ago ) and there was an amazing difference between the bare shell and the insulated sections--hot and cool. It's been wet and fairly cold the last few days and I can see the heater warming the trailer up quicker as I get more of it insulated.

Thursday, October 22, 2009

Likely the Last Outside Work Until Spring


Our weather has been a tease this week. It rains, clears up for awhile, and then rains again.

I pulled off the fiberglass forward endcap so I could buck rivets for the Wally plaque and do the antenna install. Don't know of any other 50's trailers that have the endcap in fiberglass instead of thirteen aluminum panels, but there must be others. It's so big and unwieldy that it'll likely go back up just as soon as I get the Prodex insulation installed. Planning to cover the fiberglass with a 13 panel redo in Baltic birch later on.
You can see the big roll of Prodex insulation in the endcap picture, that's next up.


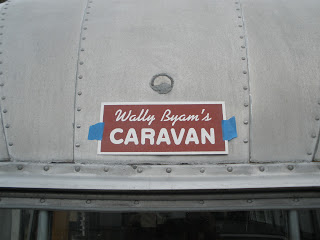
Decided to patch the lower antenna mount hole and put the Wally plaque over it, moving the antenna slightly higher. Looks the best to me this way.


Monday, October 12, 2009

Where Do I Put the Wally Plaque?


I've got the patched holes for the center mount radio antenna and I'll be putting the new antenna on as soon as I take the inside forward endcap down. Thoughts on where the Wally Byam Caravan plaque should go? From the info on the VTS site with the original instructions: "...directly over the front and rear window will be the Wally Byam Caravan plaque. Directly over the plaque will be the number. Directly above the number will be the Caravan Club decal." Do you think I should put the plaque just above the antenna mount or should I patch that lower hole so the plaque can go directly over the window?


Got the 320, 400, 500, 600, 800, 1000 grit sanding done on the rear endcap and made a quick pass with the compounder today. Not perfect as it still has some pitting, but I really don't think I want to take any more material off. Looks pretty good now and I think I can be happy enough with it. Many many hours spent here.


I installed the bulkhead passthroughs for the solar panels today. They're made by Blue Sea Systems and all of their electrical stuff is really good quality. I'll be using one of their AC breaker panels later on too. Blue Sea in Bellingham, so it's a local company too. They mount through 3/4" holes in the patch installed after the center roof vent was removed. All 4 solar panels will feed through those two posts.


Thursday, October 1, 2009

Lighting our Fire


Not really a work session today, just leak checked the propane line I installed yesterday. But we fired up the heater for the first time and sat inside the warming trailer as I soon started yawning and felt that I badly needed a nap.


I just love this little heater. Excuse the shoddy cabinet it's temporarily mounted on--it has the original cutout from the Panel Ray and will be replaced later. The exhaust pipe is also the air intake feed--it's double walled. Therefore the heater is using no air from inside the trailer for combustion (a good thing). There is no noticeable heat on the outside skin after running for a hour, so the fresh air side of the deck pipe seems to insulate heat from the exhaust very well.


Let it run for 30 minutes or so to burn off the brand new odors and then brought Pam in to sit by the fire. Nasty wet drizzly Washington day outside.


Sunday, September 27, 2009

Solar and Heat


Today might just be our last day with mid 60's temperatures for this year.  We never know in the Pacific Northwest.  I needed one more good day to get some solar mounted on the trailer and got that done today.  With the center roof vent gone I've got room for two 50 watt panels and two 60 watt panels.  I took two of those off the boat last night and now they're on the Airstream.  Mostly on the recommendation of John, FLYNCLD, who has them on his '62 Flying Cloud, I got the mounts and tilt bars from AM Solar.  They mount with a special 3M tape that needs at least 60 degrees to use, thus the need to do it before cold weather comes.


I also got the patch clecoed on for the stack for the Dickinson Heater, the hole cut for the stack, and it temporarily screwed on.  Nobody to be found on a Sunday to help me rivet, so maybe I'll get that done tomorrow and get the heater itself mounted.


Saturday, September 26, 2009

Rivets

I've been drilling out a bunch of rivets taking the upper inside panels off, but yesterday I practiced and today I got to use my rivet gun and put in some actual aluminum bucked rivets.  The plan was to borrow a compressor, but the available one had no gauge and no way to regulate it, so I needed another plan.  One of the other tenants in the storage yard came by to look at my progress, we started talking about compressors, and he told me to check out the pawn shop by the airport.  Really good advice it was and I've got what looks like a brand new Porter Cable 150 psi unit for $75.


Yesterday I set up my practice piece and went to work.  Really want to thank all the rivet experts, particularly Aerowood, over at airforums.com for all the knowledge I've been able to pick up on riveting from their threads and posts.  I removed the center Hehr vent, the powered one, grabbed a marina friend to buck for me, and riveted on a patch over the hole.  I took out the vent (sorry, Frank) so I've got a clear span for solar panels that hopefully go on tomorrow.  Planning to put Fantastic Fans in those remaining vents, fore and aft.

I received my Dickinson Propane Heater and have begun the temporary mount in the permanent location by the door.  I wanted to get heat in the trailer so I can continue to work inside this winter.  Pam will be able to sit inside in front of a cozy little fireplace.

Camera battery died after the one picture, so I'll get more up tomorrow.

Tuesday, September 15, 2009

Just a couple of little jobs today


My recent progress with polishing the rear endcap made me revisit whether or not I wanted to strip my existing overhead panel or replace it with new. One of my buddies in the marina suggested I ask myself if I had more money or more time. Therefore I started stripping one of those panels today. They're mostly behind cabinets anyway and I'll still replace the center overhead panel since I'm getting rid of the center hatch and will have a different light layout. Seems like a million bucked rivets on each side of that center panel, but I'm sure it's really only a thousand.


I had respite care watching Pam today and treated myself to having lunch in my trailer sitting at my refinished table. That's the only woodwork I've redone so far, but I just love the table: so simple and light, but pretty big and sturdy too.


Put on a new piece of threaded rod, taller, for my propane tanks. One of them needs polish. Heater gets here in a few days, but it'll just be a temporary install to keep the trailer warm for work this winter.


Thursday, September 10, 2009

The Rain Has Come Back to the Pacific Northwet

 
I've got nearly all of the fasteners in the subfloor, lacking only a few in the C channel corners where I need some help backing the nuts in those spots where access is really tight. Those bolts that go through the outriggers and C channel have been time consuming too as I've had to do them one at a time with a pair of vice grips holding the bolt head on the bottom while I tighten the nut from the top. Rest of the floor has had the bolt head indentations and seams filled with thickened epoxy.


The plan was to epoxy the topside of the subfloor (like the bottom side is already done) and lay one layer of fiberglass cloth in the areas covered by cabinets. I'm now just going to lay that layer of cloth over the whole floor--cloth is cheap, I'm using the epoxy anyway, and it's just as easy to do. Overkill, I'm sure, but it'll give me a virtually waterproof subfloor. First section got laid down today.


I'd put in bunches of hours earlier stripping and polishing the rear inside end cap, but it just wasn't coming around. It has something like etching from the old Zolatone on it--feels smooth to the touch, but it isn't. Somebody came by and looked at it and suggested S.O.S pads and the thought of little rusty bits of steel scared me to death. Today I sanded a small piece as a test and then moved on to the endcap itself. I started with 400 grit and moved up grade by grade until it was done with 1000 grit, cleaned it with mineral spirits, and then polished again with G6 and then F7. Huge improvement and hopefully it shows in the photos (hard to take pics of shiny stuff!). Some of the etching is still there, but much is gone. Maybe I could go over it again starting with 320, but I hate to get too aggressive with it.